How to Compost in a Small Apartment Zero Waste: Worth Buying
If you're wondering how to compost in a small apartment zero waste, you've already cracked the first mental barrier. Most people assume composting needs a backyard bin and a shovelful of dirt. That myth stops right here. Your kitchen counter, a closet shelf, or a sunny windowsill is plenty.
The real enemy isn't space, it's methane. When food scraps rot in landfill plastic bags, they produce methane, a greenhouse gas 28 times more potent than CO₂. Diverting even a single person’s food waste makes a measurable dent.
The average person throws away half a pound of food each day. In our research, that adds up to over 180 pounds per year, enough to fill a bathtub. Apartment composting isn't about creating garden-ready soil overnight. It's about smart containment, minimal fuss, and matching a system to your actual habits.
As of 2026, the options are more refined than ever, but picking the wrong one guarantees failure. Let's match your reality to the right method.
The Real Problem With Food Waste in Apartments
Why your trash can is a methane factory
Food waste in landfill isn't just waste, it's an active climate pollutant. When organic matter decomposes without oxygen, anaerobic bacteria take over and churn out methane. The EPA confirms that landfills are the third-largest source of human-related methane emissions in the United States. Your banana peel in a sealed plastic bag is part of that problem.
The space, smell, and effort constraints that kill most attempts
Apartment composting fails for three repeatable reasons. First, space is tight. You can't store a massive tumbler. Second, smells attract pests, and nobody wants fruit flies in their studio.
Third, if a system needs daily babysitting, you'll abandon it. The solution must be passive, compact, and odor-controlled. Most beginners underestimate the smell factor. A poorly managed bin doesn't just smell bad; it creates a persistent kitchen odour that lingers in soft furnishings.
Your Three Main Options (Pick Based on Your Reality)
Every apartment composter has to choose between speed, convenience, and input flexibility. There's no single best method, only the best method for your specific constraints. Your choice hinges on what you eat, how much space you can spare, and how much time you'll realistically spend.
Bokashi Bucket System: The Meat-and-Dairy Friendly Workhorse
Bokashi is a fermentation process, not traditional composting. You're not creating soil directly; you're pickling your scraps using beneficial microbes. The system is an airtight bucket with a spigot. You add scraps, sprinkle them with Bokashi bran (a mix of wheat bran and effective microorganisms), and press down to remove air.
The lack of oxygen prevents rotting and the associated smells. In about two weeks, you get a pre-compost material that must be buried or added to a soil bin to finish breaking down.
What makes it unique:
- Accepts meat, dairy, and cooked foods. This is the killer feature for zero-waste apartments. Most indoor systems ban these.
- Works entirely indoors. No balcony needed.
- Speed. Fermentation finishes in 10-14 days, though you still need to bury the output.
- No worms, no turning. It's bucket-based and low-intervention.
The trade-off: You must drain the leachate (Bokashi tea) every 2-3 days and dilute it for plants, or pour it down the drain to prevent sewer odours. The output is acidic and needs final composting in soil.
Vermicomposting (Worm Bin): The Steady Producer
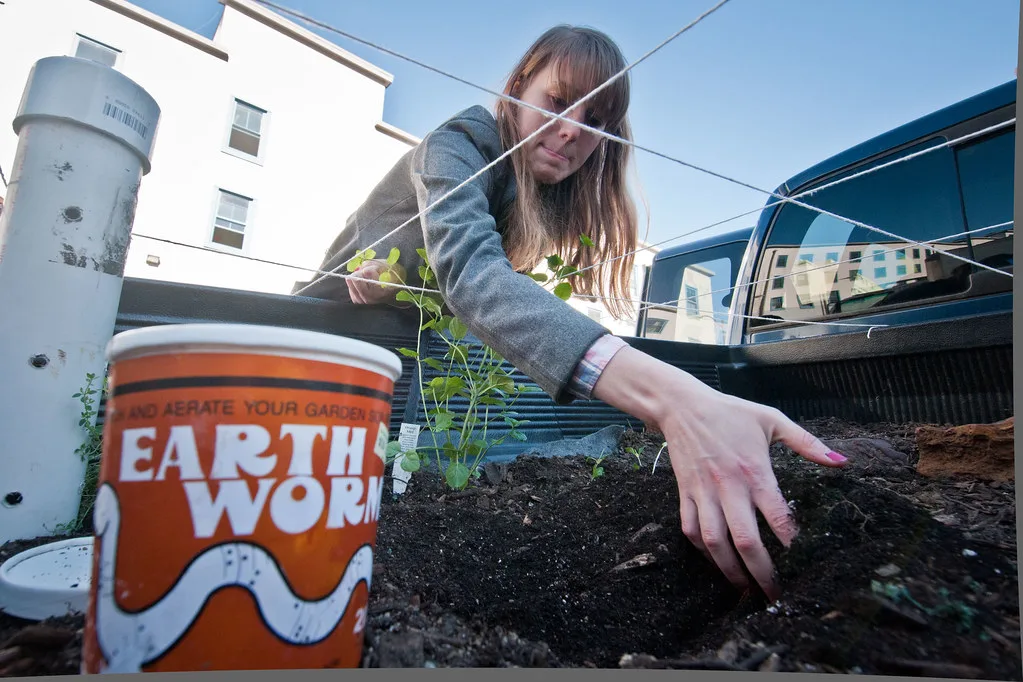
Vermicomposting uses red wiggler worms (Eisenia fetida) to consume food scraps and produce castings, a potent fertilizer. This method is aerobic, meaning it needs airflow. It's ideal for fruit, vegetable peels, coffee grounds, and crushed eggshells. It fails with meat, dairy, oily foods, or citrus in large amounts.
Worm bins are scalable. You can start with a simple 10-gallon tote under the sink or a sleek stacking tray system on a countertop. Bedding made from shredded cardboard and coconut coir holds moisture and provides carbon. You add scraps to one corner, cover with bedding, and let the worms migrate through.
Harvesting finished castings takes 2-3 months for a well-established bin.
What makes it unique:
- Produces high-value castings. Worm castings are a complete soil amendment, often selling for $20+ per pound.
- Quiet and odourless when balanced. A healthy worm bin has an earthy smell, like forest soil.
- Educational. You can watch the process and monitor worm health.
The trade-off: You cannot add animal products. It requires consistent moisture and pH balance. If you travel for more than a week, you'll need a vacation feeder or a neighbour to top up bedding. Worms are living creatures; they can escape if conditions go wrong.
Electric Countertop Composter: The "Set and Forget" Choice
Electric composters like the Lomi or Vitamix FC-50 are dehydrators and grinders. They accelerate aerobic decomposition using heat and mixing, but they don't produce finished compost in the traditional sense. They reduce volume by up to 90% and output a dry, sterile material that acts as a soil booster. Some models claim "compost in 3 hours," but the output still benefits from a finishing period in a pot with active soil.
What makes it unique:
- Speed and convenience. It processes scraps the same day.
- No manual turning or feeding. Just dump and press a button.
- Handles a wider range of waste. Most accept small amounts of meat and dairy, though manufacturer guidelines vary.
- Compact footprint. Designed for countertop use.
The trade-off: High upfront cost, typically $300-$500. They use electricity (costing roughly $0.50-$1.00 per cycle). Noise is a factor; units sound like a slow blender for several hours. They are also capacity-limited, handling about 1-2 pounds per batch.
If you generate more waste, you'll run multiple cycles.
The Decision Guide: Which Method Actually Fits Your Life
Forget what looks coolest on Instagram. Your success depends on matching the method to your daily habits and physical space. Answer these six questions honestly.
Answer these six questions to pick your path
- Do you have a balcony, patio, or fire escape? If yes, Bokashi is easier because you can bury the pre-compost outside. If no, vermicomposting or electric is better for indoor-only output.
- How many pounds of food waste do you realistically generate per week? Weigh your food scraps for three days. Under 2 lbs? A small worm bin or electric unit works. Over 5 lbs? Bokashi handles volume better.
- Will you be away more than 3 days at a time? Bokashi can be paused; worms need consistent feeding. Electric is fine if you turn it off.
- Do you eat meat, dairy, or cooked foods? If yes, Bokashi or electric are your only viable options.
- What's your startup budget? Worm bin: $40-$100. Bokashi: $30-$60. Electric: $300-$500.
- How much weekly maintenance are you willing to do? Bokashi: 2 minutes to drain tea. Worm bin: 5 minutes to add bedding. Electric: 30 seconds to empty the bucket.
Decision tree flowchart: Match your answers to your method
If you eat meat/dairy regularly AND have no balcony → Electric composter.
It’s the only fully indoor method that avoids the two-week Bokashi finishing step.
If you eat meat/dairy AND have outdoor space → Bokashi.
Lower cost, higher waste capacity.
If you eat only fruit/veg scraps AND are home regularly → Vermicomposting.
Best long-term value and soil output.
If you travel frequently AND generate little waste → Bokashi with a pause.
It’s the most forgiving during absences.
Setting Up Your Chosen System
Bokashi First Steps
Start with a five-gallon food-grade bucket with a tight-sealing lid and a spigot near the bottom. Drill 10-15 small aeration holes (1/8 inch) in the top of the lid; these let CO₂ escape without letting oxygen in, which is crucial for anaerobic fermentation. Place a plate or heavy lid insert inside to press scraps below the liquid level.
Position your bucket where temperatures stay between 50-85°F. Cold slows fermentation; heat speeds it up too much and risks smells. In our research, basement storage closets often hit the sweet spot. Add your first layer of scraps, sprinkle with a handful of Bokashi bran, and press down.
Repeat layers until the bucket is three-quarters full. Seal the lid, wait 10-14 days, and drain the leachate before adding more scraps.
Worm Bin Foundation
For a small apartment, a 10-12 inch deep bin works best. Stacking tray systems like the Worm Factory are popular because they simplify harvesting; you add food to the bottom tray and worms migrate upward. Single bins are cheaper but require you to manually separate finished compost.
Prepare bedding by soaking shredded corrugated cardboard and coconut coir in water, then wringing it out until it feels like a damp sponge. Fill the bin two-thirds full. Add a handful of soil or finished compost to introduce microbes. Bury food scraps under bedding in one corner each time you feed.
Start with a small amount, about half a cup, and increase as the worms multiply. Keep the bin in a spot with indirect light and stable temperature, ideally 60-75°F. Worms will breed as long as conditions are right, so you shouldn't need to buy more after the initial colony.
Electric Composter Basics
Place the unit on a stable countertop near an outlet. Ensure at least six inches of clearance above for ventilation. Most models have a carbon filter in the lid that needs replacing every 3-6 months. Fill the bucket no more than two-thirds full; overloading jams the mixing mechanism.
Cut large scraps into two-inch pieces to prevent clumping. Run the standard cycle for daily scraps; use the "compost" or "grow" mode for denser waste. Empty the dried output into a storage container. Clean the bucket after every few cycles to prevent residue buildup.
The Maintenance Schedule You'll Actually Follow
Daily tasks (takes 30 seconds)
Bokashi: Lift the lid, add scraps, sprinkle with bran, press down, and reseal. That’s it.
Worm bin: Peek at the surface. If you see food, cover it with bedding. Check for excess moisture.
Electric composter: Empty your countertop collector into the machine and start the cycle. No daily input needed beyond collection.
Weekly checks (5 minutes max)
Bokashi: Drain the leachate. A full bucket produces about a cup of liquid every few days. Dilute it 1:100 with water for plants, or pour it down the drain as a deodorizer.
Worm bin: Gently fluff the top layer of bedding to prevent compaction. Check the bin’s edges for escaping worms or mites.