Guide to Worm Castings Homemade Fertilizer Raised Beds 2026
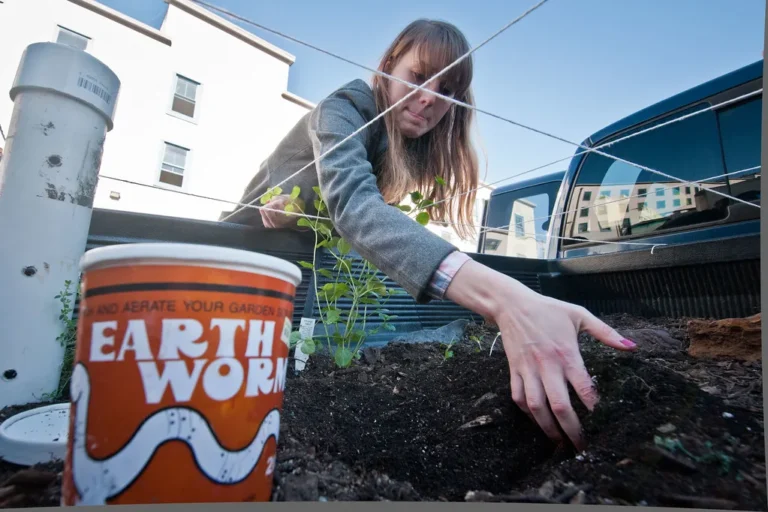
If your raised beds are looking a bit tired, or you’re tired of buying bags of fertilizer, worm castings are a simple, powerful fix. Worm castings homemade fertilizer for raised beds isn’t just a clever hack; it’s a complete soil overhaul in a handful of dark, crumbly gold. It’s the end product of red wigglers eating your kitchen scraps, and it’s arguably the best thing you can add to your garden.
This isn’t about fancy equipment or a big yard. It’s about turning food waste into a nutrient powerhouse that improves soil structure, retains water, and feeds plants gently. Research from the Rodale Institute and university extensions consistently shows that vermicompost can boost plant growth and yield by over 25% compared to standard compost. Let’s work out if this approach fits your life and how to make it happen.
First, Let's Figure Out If This Is Right for You
Before you buy a single worm, answer these three quick questions. This isn't a test, just a way to see if vermicomposting will stick.
Do you have a consistent stream of kitchen scraps?
If you regularly have fruit and veg peelings, coffee grounds, or eggshells, you have the fuel. A small household generates enough for a basic bin.
Can you spare a spot indoors or in a sheltered outdoor area?
Worms need a stable environment. A corner of the garage, a balcony, or under the sink works. They don’t smell if managed right.
Are you willing to check on it once a week?
It’s low-maintenance, but not zero-maintenance. You’ll need to feed and occasionally fluff the bedding.
If you answered yes to these, you’re good to go. This is a forgiving project for beginners and a powerhouse tool for experienced gardeners.
Choosing Your Worm Bin: It's All About Your Situation
Your bin is the engine room. Picking the right one depends on your space, budget, and how much food waste you produce. Here’s the breakdown.
Plastic Tote (DIY)
This is the classic starter bin. Get a 10-15 gallon opaque storage tote. Drill air holes in the sides and top. It’s cheap, easy to move, and perfect for a balcony or closet.
The downside? It’s a single chamber, so harvesting can be a bit messy.
Wooden Bin
Cedar or untreated pine bins breathe better, which helps with moisture control. They’re often built for outdoor use like a porch or shed. They look a bit nicer but can dry out faster and are more expensive than a plastic tote.
Stackable Tray System
These are the fancy, efficient models. You start in the bottom tray, and as you add food, the worms migrate upward into fresh trays. You harvest the finished castings from the bottom without disturbing the workers. Best for larger families or if you want a more “set and forget” system.
The Quick Decision Guide
| Your Situation | Best Bin Type |
|---|---|
| Tight budget, very little space, just starting out | DIY Plastic Tote |
| You have some cash, want something that lasts outdoors | Wooden Bin |
| You have lots of scraps, hate harvesting hassle, want maximum output | Stackable Tray System |
What to Feed Your Workers (And What to Absolutely Avoid)
Your worms are picky eaters, and their diet is your responsibility. Feed them right, and they’ll reward you with castings. Get it wrong, and you’ll have a stinky mess.
The Yes List: Their Favourites
- Fruit and veg scraps: The core of their diet. Peelings, cores, wilted lettuce.
- Coffee grounds and filters: They love it. It’s slightly acidic but balances with the bedding.
- Crushed eggshells: Essential for grit (they have no teeth) and to keep the bin’s pH neutral.
- Tea bags (staple removed): Check the bag is plastic-free or it will linger.
- Shredded paper/cardboard: This is their bedding and a carbon source. Think of it as their bed and breakfast.
The Hard No List: Never Add These
- Meat, fish, dairy, or oils: These attract pests and create foul odours.
- Citrus peels and onions in excess: Too acidic. A little is fine, but don’t dump a bag of orange peels.
- Glossy or coloured paper: The inks and coatings can be toxic.
- Pet waste or diseased plants: Risk of pathogens.
The Feeding Rhythm
A good rule of thumb is to start with about half a cup of food scraps per 1,000 worms per day. Bury the food under the bedding each time. If there’s lots of uneaten food after a few days, you’re overfeeding. Slow down.
If it’s gone in a day, you can add a bit more next time.
Creating the Perfect Home: Moisture, Air, and Temperature
Think of your worm bin as a rainforest floor, not a desert or a swamp. The conditions need to be just right.
The Sponge Test
This is the single most important check. Grab a handful of bedding and squeeze it. You should get a few drops of water. If it gushes, it’s too wet.
If no water comes out, it’s too dry. Add dry shredded cardboard if it’s wet, or a splash of water if it’s dry.
The Breathability Factor
Worms breathe through their skin, so they need oxygen. Don’t pack the bedding down tightly. Fluff it up with a fork every week or two. Your bin must have air holes.
If you smell ammonia, it’s low on oxygen, add more bedding and aerate.
The Goldilocks Zone
Red wigglers thrive between 55-77°F (13-25°C). They slow down or die outside this range. Keep them in a garage or basement in winter if temperatures plummet. In summer, ensure they’re not in direct sun; a shaded porch is ideal.
As of 2026, most urban settings provide enough shelter for year-round success.
From Scraps to Black Gold: The Harvesting Workflow
Harvesting is the fun part. It signals you’ve done it right. The method depends on your bin type.
Method 1: The Migration (Push-Aside) Method
Best for stackable systems or plastic totes.
- Stop adding food to the bottom tray.
- Add a new tray or a thick layer of fresh bedding and food on top.
- Wait 2-3 weeks. The worms will migrate upward toward the new food.
- The bottom tray will be full of finished, worm-free castings. Simply remove it and start again from the top.
Method 2: The Dump & Sort Method
Best for a one-off harvest from a single tote.
- Dump the entire contents onto a tarp or tray under a light source (worms hate light).
- Sort the finished castings into a pile, separate from any large bits of bedding.
- The worms will quickly burrow away from the light. Gather them and put them into a fresh bin with new bedding.
Method 3: The Side-Harvest Method
Best for plastic totes.
- Push all the material to one side of the bin.
- Fill the empty side with fresh, moist bedding and food.
- Over 2-3 weeks, the worms will migrate to the new side.
- You can then harvest the castings from the old side.
How to tell it’s ready: Finished castings look like dark, crumbly coffee grounds with no recognizable food scraps or bedding. They have a pleasant, earthy smell.
Using Your Castings in Raised Beds: Timing and Technique
You’ve got the goods. Now, how do you use them for maximum impact in your raised beds? It’s not just about dumping them in; timing and method matter.