Guide to Regenerative Gardening With Native Plants in 2026
If you've ever felt overwhelmed by your garden, constantly battling pests, weeds, or demanding plants, you're not alone. Many conventional gardening methods can feel like a never-ending chore, often leading to depleted soil and reduced local wildlife. That's why diving into regenerative gardening with native plants can be such a game-changer for your yard and the environment around it.
It's about working with nature, not against it, building a resilient ecosystem right at home. In our research, gardens adopting these principles often report a significant decrease in water usage, sometimes by 50% or more compared to traditional lawns, as verified by university extension studies. Let's walk through how to transform your garden into a thriving, self-sustaining haven.
Image source: Wikimedia Commons / cultivar413 (CC BY)
Why Go Regenerative and Native?
Choosing regenerative gardening with native plants isn't just a trend; it's a fundamental shift in how we approach our outdoor spaces. This method focuses on improving ecosystem functionality, making your garden a hub of biodiversity and a powerhouse for soil health. You're moving away from constant intervention and towards a system that largely manages itself once established.
Think about it: native plants have evolved over millennia to thrive in your specific local climate, needing less water, no fertilizers, and rarely attracting the "pest" issues that plague non-native ornamentals. They're already perfectly adapted to the USDA Plant Hardiness Zone you live in, along with your local rainfall patterns. When you couple this with regenerative practices, you're not just planting; you're actively restoring. You're creating a living soil food web that cycles nutrients naturally, sequesters carbon, and supports the very pollinators and wildlife essential for our planet's health.
It's a low-effort, high-impact approach that benefits both you and the environment.
Understanding Your Starting Line: Site Assessment Essentials
Before you plant a single seed or dig a new bed, understanding your current site is crucial. This isn't just about knowing what's there; it's about seeing the potential and identifying any challenges. A thorough site assessment helps you make informed decisions, ensuring the native plants you choose will truly thrive and your regenerative efforts pay off. You wouldn't build a house without checking the foundation, right?
Your garden is no different.
Deciphering Your Soil: A Gardener's Goldmine
Your soil is the foundation of your regenerative garden. Knowing its composition and health is the single most important step you can take. A soil test, often available through your local University Extension Office, is invaluable. This isn't just guesswork; it's scientific data.
Here's what a good soil test tells you:
- pH Level: This indicates how acidic or alkaline your soil is. Most native plants prefer a specific pH range, so understanding this helps you select appropriate species.
- Nutrient Levels: You'll see concentrations of essential nutrients like nitrogen, phosphorus, and potassium. With regenerative practices, we aim to build soil that provides these naturally, reducing the need for external inputs.
- Organic Matter Percentage: This is a big one for regenerative gardening. Higher organic matter means better soil structure, increased water retention, and a thriving soil food web. A healthy garden soil typically aims for 5% or more organic matter.
- Soil Texture: Is it sandy, silty, or clay-heavy? This influences drainage and water retention. You might have sandy loam, for instance, which handles water differently than heavy clay.
Once you have these numbers, you can pick plants that naturally prefer your soil's conditions. For example, some native wildflowers absolutely love well-draining, sandy soil, while others might thrive in more clay-rich, moisture-retentive areas.
Sun, Shade, and Slopes: Mapping Your Microclimates
Your yard isn't just one big uniform space; it's a patchwork of microclimates. Different areas receive varying amounts of sunlight throughout the day, have different wind exposures, and can vary in moisture levels, especially on slopes. Mapping these zones helps you place the right plant in the right spot, mimicking how they'd grow in nature.
Grab a notepad and spend a few days observing your yard.
- Sunlight Patterns: Track how many hours of direct sun different areas receive. A spot getting 6+ hours is full sun, 4-6 hours is partial sun, and less than 4 is shade. Remember, the sun's path changes with the seasons, so consider that, especially as of 2026.
- Drainage and Moisture: After a rain, where does water pool? Where does it run off quickly? Are there consistently damp spots or incredibly dry patches? This tells you a lot about your soil's ability to hold water.
- Wind Exposure: Exposed, windy areas can dry out plants faster and stress them more. Sheltered spots might retain more moisture and offer protection.
- Slopes and Elevation: Sloping areas are prone to erosion and faster water runoff. Low-lying areas might collect water.
These observations directly inform your plant choices. A plant that loves full sun and dry conditions won't be happy in a constantly damp, shady corner, and vice versa.
Your Existing Garden: Friend or Foe? (Identifying Existing Vegetation)
What's already growing in your garden? Taking stock of existing plants, especially weeds, is a crucial step. This helps you understand what you're working with and what needs to be addressed. Sometimes, what you think is a "weed" could be a surprisingly useful native.
Other times, it's a true invasive species that needs careful removal.
- Identify: Use resources like your local University Extension or apps like iNaturalist to identify both desirable and undesirable plants. Don't assume.
- Native vs. Non-Native: Prioritize removing aggressive non-native or invasive plants. These often outcompete native species and offer little ecological value.
- Perennials vs. Annuals: Annual weeds are generally easier to manage, while perennial invasives might require more persistent effort.
- Beneficials: Are there existing native trees or shrubs providing shade or structure? You'll want to integrate your new plantings with these.
Understanding your existing vegetation helps you devise a plan for clearing, preparing, and planting, ensuring your regenerative efforts aren't sabotaged by aggressive intruders.
The Native Plant Powerhouse: Why Local Matters
When we talk about "native plants," we're not just talking about any plant that happens to grow wild somewhere in North America. We're talking about plants that are indigenous to your specific local ecoregion and have evolved there for centuries, sometimes millennia. This precise connection is what makes them so powerful for regenerative gardening. They're perfectly tuned to your local soil, rainfall, temperature extremes, and even the local insect and bird populations that rely on them for food and habitat.
This isn't just about aesthetics; it's about ecological function. Native plants form the base of the local food web, providing critical support for pollinators like native bees and butterflies, as well as birds and other wildlife. They don't need fussy care because they're already adapted to the climate and pest pressures. This drastically reduces the need for supplemental water, fertilizers, and pesticides, aligning perfectly with regenerative principles and significantly lowering your long-term maintenance.
Sourcing True Natives: Avoiding Common Pitfalls
Sourcing the right native plants can sometimes feel a bit like detective work, but it's worth the effort. Not all plants labeled "native" at a conventional garden center are truly native to your specific area, or they might be "nativars" (cultivars of native plants) that have been bred for specific traits, sometimes at the expense of their ecological value.
Here's how to ensure you're getting the real deal:
- Local Native Plant Nurseries: These are your best bet. They specialize in plants native to your specific region and often avoid nativars, focusing on true ecotypes. They can also offer invaluable advice on what will thrive in your specific site conditions.
- Native Plant Societies: Your local or state native plant society is an incredible resource. They often host plant sales, provide lists of reputable nurseries, and can connect you with other enthusiasts.
- University Extension Offices: These offices sometimes have demonstration gardens or lists of locally appropriate native plants.
- Seed Sources: If starting from seed, look for reputable suppliers that specify local ecotypes or source their seeds regionally.
- Avoid "Straight Species" vs. "Nativar": A "straight species" is the wild form of the plant. A "nativar" is a cultivated variety. While some nativars are fine, research suggests that some altered traits (like double flowers or different leaf colors) can reduce their value to pollinators. When in doubt, go for the straight species.
Don't be afraid to ask questions at the nursery about the origin of their plants. A good native plant nursery will be happy to share details about where their stock comes from and why it's suitable for your area.
Regenerative Practices: Building a Living Ecosystem
Regenerative gardening is all about working with nature to build healthy, living soil and a resilient ecosystem. It's a set of practices that go beyond simply "organic" by actively improving the land over time. The goal isn't just to grow plants; it's to enhance the entire web of life, from microorganisms in the soil to the birds flitting overhead. This means focusing on minimizing disturbance, maximizing soil cover, encouraging biodiversity, and integrating animals where possible (even if just beneficial insects).
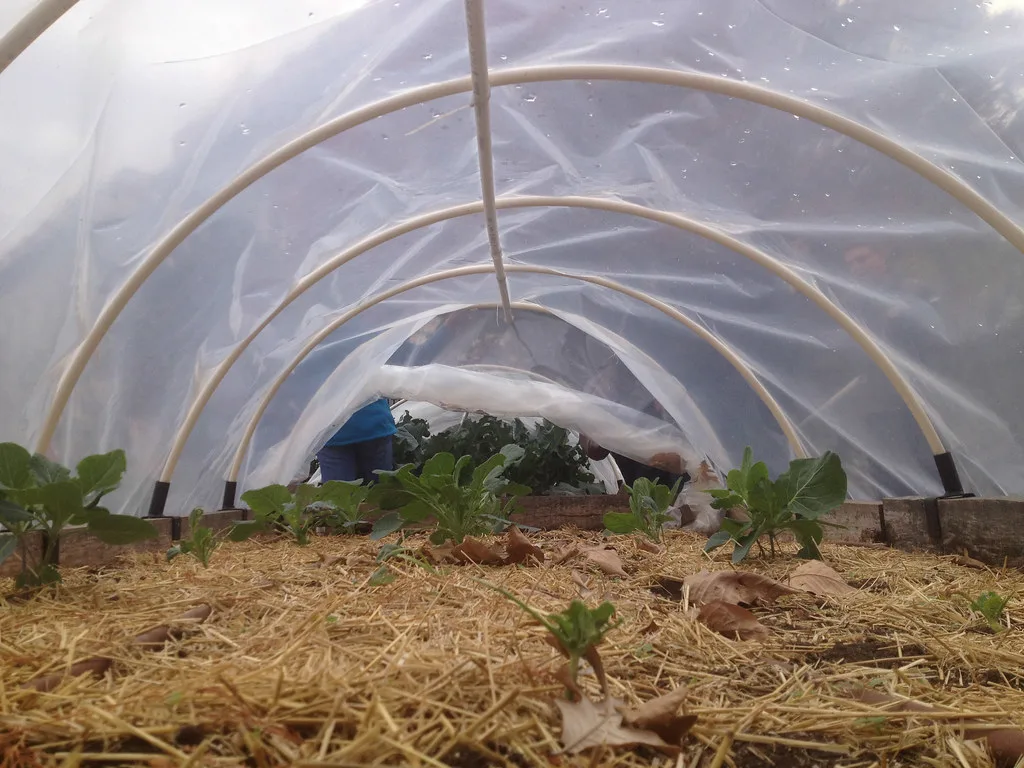
These practices build on each other, creating a virtuous cycle where healthier soil leads to healthier plants, which in turn support more wildlife and make your garden even more resilient. It's a long-term investment that yields increasingly beautiful and vibrant results.
No-Till Tactics: Protecting Your Soil's Structure
One of the cornerstones of regenerative gardening is minimizing soil disturbance. That means embracing "no-till" or "no-dig" methods. Traditional tilling, while seemingly helpful for breaking up compacted soil, actually disrupts the intricate network of the soil food web. It destroys the fungal hyphae (like mycorrhizal fungi) that help plants absorb nutrients and water, releases stored carbon into the atmosphere, and can bring dormant weed seeds to the surface.
Instead of tilling, we focus on gentle, surface-level amendments:
- Sheet Mulching: This is a fantastic way to prepare a new bed without digging. You layer organic materials directly on top of existing grass or weeds. This usually involves a layer of cardboard (to suppress weeds), followed by thick layers of compost, wood chips, leaves, and other organic matter. Over time, these layers break down, feeding the soil and suffocating unwanted plants.
- Compost Top-Dressing: Regularly applying a thin layer of compost to the soil surface feeds your soil microorganisms without disturbing their homes. This also slowly improves soil structure.
- Broadforking (Limited Use): For severely compacted soil, a broadfork can be used to aerate without inverting soil layers. It's a gentler alternative to a rototiller, but still used sparingly.
By leaving the soil structure intact, you're nurturing the beneficial microbes, fungi, and invertebrates that are essential for nutrient cycling and overall soil health.
Compost and Mulch: Feeding the Soil Food Web
Compost and mulch are the dynamic duo of regenerative soil building. They're not just amendments; they're vital inputs that fuel the soil food web, which is the engine of a healthy ecosystem.
- Compost: This is decomposed organic matter, rich in diverse microbial life and slow-release nutrients. Incorporating compost (or letting it break down on the surface) directly feeds bacteria, fungi, protozoa, and nematodes in your soil. These organisms break down organic matter into forms plants can use, improving soil structure, water retention, and overall fertility.
- Mulch: A layer of organic material (like wood chips, shredded leaves, or straw) placed on the soil surface serves multiple functions:
- Weed Suppression: It blocks sunlight, preventing weed seeds from germinating.
- Moisture Retention: It reduces evaporation, meaning you water less frequently. This is huge for water conservation.
- Temperature Moderation: It insulates the soil, keeping it cooler in summer and warmer in winter.
- Soil Building: As mulch slowly breaks down, it adds organic matter and nutrients to the soil, just like compost.
- Erosion Control: It protects the soil surface from the impact of rain and wind.
Always use organic mulches that will decompose and feed your soil. Avoid plastic or inorganic mulches like landscape fabric or lava rock, as these don't contribute to soil health.
Water Wisdom: Smart Irrigation with Native Plants
One of the big promises of regenerative gardening with native plants is significantly reduced water consumption. Native plants, by their very nature, are adapted to your region's natural rainfall patterns. Once established, many can thrive on rainfall alone. However, during the initial establishment period and particularly dry spells, smart irrigation is still important.
Here's the regenerative approach to watering:
- Deep and Infrequent Watering: When you do water, water deeply. This encourages native plants to send their roots deeper into the soil, making them more resilient to drought. Shallow, frequent watering keeps roots near the surface, making plants dependent on you.
- Observation is Key: Don't water on a rigid schedule. Instead, feel the soil. Is it dry a few inches down? Are your plants showing signs of stress (wilting)? Water only when needed.
- Rainwater Harvesting: Consider setting up a rain barrel or other rainwater harvesting system. This captures free, unchlorinated water for your garden, further reducing your reliance on municipal water.
- Efficient Delivery: Drip irrigation or soaker hoses deliver water directly to the plant's root zone, minimizing evaporation and runoff compared to overhead sprinklers.
- Mulch, Mulch, Mulch: As mentioned, a good layer of organic mulch dramatically reduces evaporation, meaning the water you do apply stays in the soil longer.
The goal is to wean your native plants off supplemental irrigation as they mature. You'll find yourself watering far less than with a conventional garden, especially after the first year or two.
Your Regenerative Native Garden Decision Tree
Embarking on a regenerative native garden journey can feel like a big project, but breaking it down into a decision tree makes it much more manageable. Your specific starting point and goals will guide which path you take. Think of this as a personalized roadmap, helping you make the right choices for your unique situation.
The core idea here is to match the appropriate regenerative techniques and native plant selections to what you've already assessed about your site. You don't apply every solution to every problem; you choose the best fit.
Branch 1: Starting Fresh (New Bed Creation)
If you're looking at a patch of lawn, an unused area, or completely clearing an existing bed to start anew, this is your branch. The key here is proper site preparation and soil building from the ground up.
If you have an area currently covered by lawn or aggressive weeds, then:
- Map it out: Use your site assessment data. Mark out the new bed, considering sunlight, drainage, and existing features.
- Suppress existing vegetation: Your best bet for minimal disturbance is sheet mulching. Layer cardboard directly over the grass/weeds, overlap the edges significantly, and then add 4-6 inches of organic material (compost, wood chips, leaves). This takes time (often 3-6 months for full breakdown), so plan ahead.
- Perform a soil test: If you haven't already, get that test done. It guides your plant choices.
- Select native plants: Choose species truly native to your ecoregion that match your specific site conditions (sun, shade, soil type, moisture). Focus on a diverse mix to support a wide range of wildlife.
- Planting: Plant into the prepared sheet mulch, cutting holes through the layers to reach the improved soil beneath.
- Initial watering: Water deeply and consistently during the first establishment year, then gradually reduce as plants become established.
- Ongoing mulch: Keep the bed well-mulched to suppress weeds and feed the soil.
This approach builds incredibly rich, healthy soil right from the start, setting your new native garden up for long-term success with minimal future intervention.
Branch 2: Enhancing an Existing Garden
Maybe you don't want to start from scratch. Perhaps you've got some existing ornamental beds, but you want to transition them to be more ecologically beneficial. This branch focuses on gradual conversion and integration.
If you have an existing garden bed with some plants you want to keep, and others you want to remove, then:
- Identify and remove invasives/undesirables: Carefully identify any truly invasive plant species or those you simply don't want. Remove them by hand or using non-chemical methods, focusing on getting as much of the root as possible. This minimizes soil disturbance.
- Assess remaining plants: Which existing plants are healthy, non-invasive, and do you want to keep? Work around these.
- Improve soil health: Incorporate compost by gently top-dressing the existing beds. Don't dig it in. A layer of 1-2 inches of compost every spring can dramatically improve soil structure and microbial activity over time.
- Add native plants strategically: Choose native plants that complement your existing desirable plants, paying attention to light, soil, and moisture needs. Select species that will fill ecological niches, like pollinator plants or small shrubs for bird habitat.
- Mulch deeply: Apply a generous layer of organic mulch around all plants. This suppresses weeds, retains moisture, and feeds the soil.
- Observation and iteration: Watch how your new natives perform. You might find some areas need different plants, or that you can gradually remove more non-native plants as the natives establish.
This method allows for a less disruptive transition, letting you slowly transform your garden into a regenerative native landscape. It's often less overwhelming for gardeners and can be spread out over several seasons.
Branch 3: Tackling Tricky Spots (E.g., Wet Areas, Slopes)
Every garden has its quirks. Whether it's a perpetually damp corner, a steep bank prone to erosion, or a highly exposed, windy spot, native plants offer tailored solutions. This branch helps you address these specific challenges with ecological wisdom.